Kodi: How to Install & Configure on Windows

QuadraphonicQuad

Help Support QuadraphonicQuad:

This site may earn a commission from merchant affiliate links, including eBay, Amazon, and others.
Download and use this zip file which will be used to pre-configure Kodi 19.1 for Windows.

The zip contains pre-installed add-ons for Kodi Music play back (The Artist SlideShow, Aeon Nox Silvo skin with customised menus and my QQ Codec skin mod for Aeon Nox Silvo which shows codec info and logos based on album folder naming).

NOTE: Its a 2.5GB file - I strongly advise using this if you‘re a first time user of Kodi as it greatly simplifies inital Kodi setup, this is a copy of my Kodi Windows test system for Kodi 19.1 but with no media.

https://1drv.ms/u/s!Aqs3ia6BNDDHiWJ7UvKJP-OWr3GZ?e=ryefis
You should install Kodi 19.1 before using this zip.
 
Last edited:
AFTER you install Kodi: You must not be running Kodi when doing the next step.

Go yo you Kodi folder found in this folder:

C:\Users\[YOUR USER NAME]\AppData\Roaming\Kodi

If you can’t see the AppData folder in Windows explorer you’ll need to set ‘Hidden Items‘ option ‘on‘ in Windows Explorer:

WEHiuddenItems.PNG


Copy the zip file into the folder, then unzip the contents of the Kodi.zip you downloaded earlier into your folder and overwrite any existing files:

Kodi Zip Folder.PNG


NOTE: In Windows 10 you can open the Kodi.zip file in Windows Explorer (double-click on the zip which opens it in Explorer) and copy the files to this folder

Now Kodi has all the nice add-ons and menus etc

Next Step will be to configure Kodi:

1. Set up the output devices (Audio and Video)
2. Set up Kodi's Media Sources (point to your audio files, video files)
 
Last edited:
Setup Kodi System settings for Video and Audio:

This section sets up Kodi to display match with your monitor/TV and to use HDMI pass-through so your AVR will decode DTS-HDMA, TrueHD and Atmos from Kodi (or use your PC's internal soundcard or Intel chip decoder for DTS etc).

Run Kodi.

Go to the System menu:
Kodi Setup 1.PNG


This displays the Kodi Settings screen:
Kodi Setup 2.PNG


Click on: System (as shown above)
Kodi Setup 3.PNG


In the 'Display' screen (With 'Display' selected on the side menu)

Ensure your screen resolution is set to your monitor or TV

Now select the 'Audio' side menu, this shows all the Kodi Audio settings:
Kodi Setup 4.PNG


First select the correct Audio Device. You should select HDMI if your PC is connected to an AVR

Number of channels: Set to your floor speaker arrangement, usually 5.1 or 7.1

Scroll down this Audio screen to bottom:
Kodi Setup 5.PNG


Set Allow passthrough 'On' (switch to right)

Now go through all the Dolby and DTS options and set them to on.

NOTE: There are more than what’s shown here, TureHD and DTS-HDMA etc are there too if you have an AVR connected to your PC

Thats it. Hit your ESC key or BackSpace key to exit out to you main Kodi menu


NEXT STEP: Setup Media Sources
 
Last edited:
Setup your Media Sources (Kodi Music Library):

@GOS Don't do this step yet. We need to map your NAS Share Folders to a Windows Drive first. I will create a new thread on that shortly

Kodi contains Databases that hold your media information. For Music Kodi reads all your music file tags so that you can navigate your entire music collection from the database (library), not the files. This allows extremely fast navigation and allows you to sort and filter your music collection my artist, genre, year etc.

For all this to happen you must tell Kodi where your music files are locted, which folders you are using.

Go to the Kodi System (Settings) screen (click 'System' from the main kodi menu:

Here is the Kodi Settings screen again:
Kodi Setup Media 1.PNG


This time select 'Media' from the above screen (as shown)

This displays the Kodi Media screen:
Kodi Setup Media 2.PNG


With the 'Library' side menu option activated (as shown)
Click: 'Music...' (on the right as highlighted above)

This displays the Kodi Music Library screen. This shows all your pre-defined Music folders. For a first time user this screen contains only one option 'Add Music'

In this next screen shot it shows my music folders (I have separate root folders on my NAS for these categories to easily access that music type).
Kodi Setup Media 3.PNG


To add one of your existing folders as a new Kodi Music Source:

Click: 'Add Music'

This pops up a Kodi dialog to allow you to navigate to your music root folder to select it:
Kodi Setup Media 4.PNG


In the above dialog:
Click: 'Browse'

Now navigate to your Root Music folder and select it:
Kodi Setup Media 5.PNG


Click on the folder then click 'OK' on right

(NOTE: When you click on the folder it opens that folder to show more sub-folder, just click ok without clicking any sub-folders and Kodi uses the parent folder last selected)

The Kodi dialog now shows this:
Kodi Setup Media 6.PNG


Click: OK to save this as a new Source

Kodi immediately pops up this next dialog:
Kodi Setup Media 7.PNG


Kodi wants to scan all the music files in all your selected folder's sub-folders recursively to read the tags, find album covers etc and load into its Music Library database.

NOTE: If your PC has access to the internet this next process also fetches additional metadata for artists and albums from various websites automatically.

Click: YES

Kodi now does its thing. (This can take a while for a large music collection, Kodi limits online lookups to 1 per second, it takes at least two lookups per album, one if your tags include MusicBrainz IDs).

When complete you can repeat the above process for other music drives or root folders you may have, effectively you are adding all your music to Kodi.

NOTE: Kodi never makes any changes to any media files. It only reads tags
 
Last edited:
Here's screen grabs of Kodi Music after scanning my Penteo UM folder into the library:

The Artist view: (views are configurable)
Kodi Music.PNG


The Artist's Album view (For AC/DC):
Kodi Music2.PNG


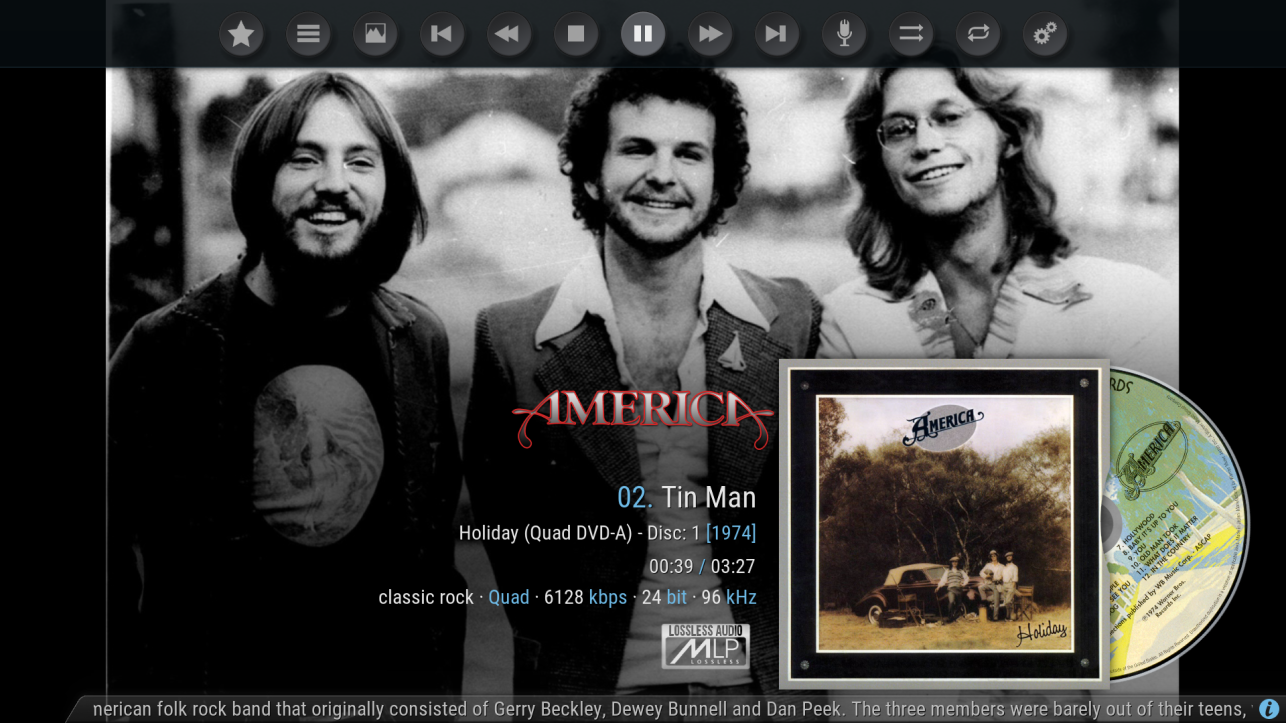
The Kodi screen when playing a track:
Kodi Music3.PNG


If there is a file named 'discart.png' or 'discart.jpg' in the album folder it is displayed next to the cover and it rotates during playback.

The Artist Slideshow runs and shows a new fanart picture in the background every 7 seconds. Pictures are downloaded automatically.

The ticker-tape line at bottom displays artist biography (auto scrolls).

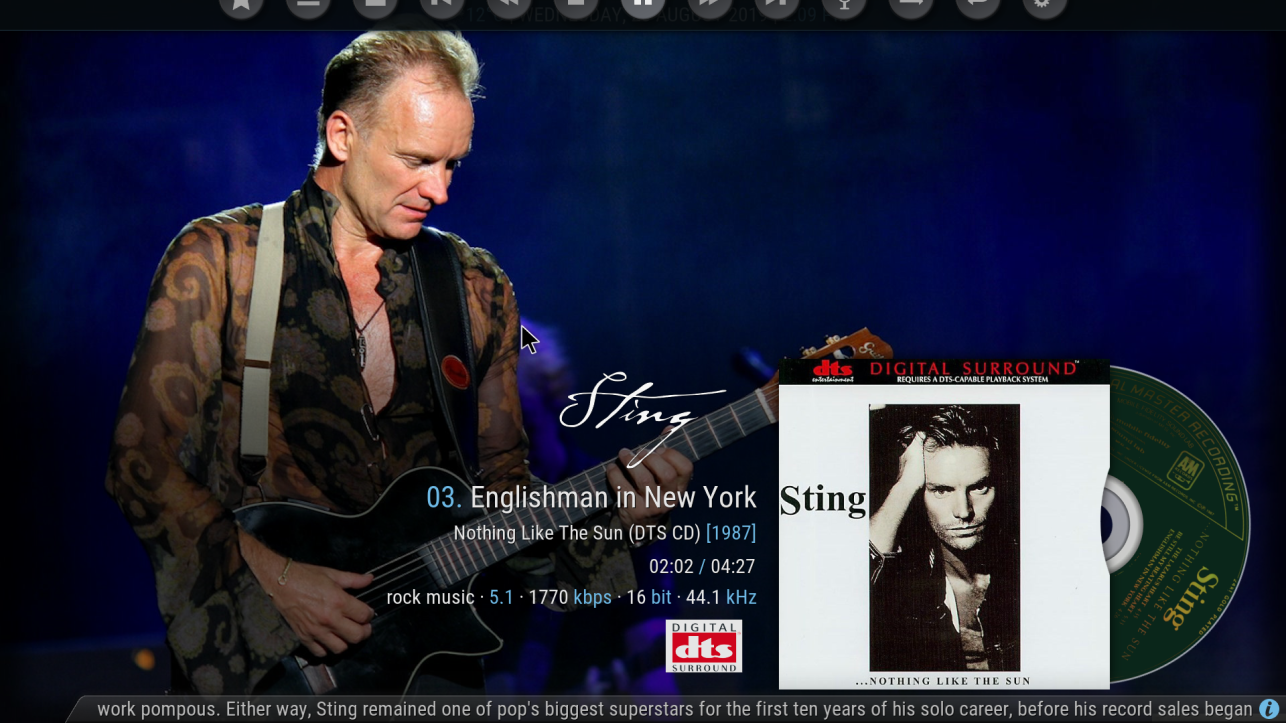
The Kodi.zip file includes my QQ codec skin mod so codec logos are displayed (Penteo for this album)
 
Last edited:
Here's a section from another thread here on QQ that describes how the QQ Codec Logo mod works:

Although I converts all my discs to FLAC I still like to know what type of disc the album was originally sourced from (DVDA, BDA, Q8, etc). I decided I could add this info to the folder name so users only need to edit their album folder names for the Aeon Nox Silvo skin to 'see' the original codec and display the logo during play back:

Examples:
DVD Audio converted to FLAC:
QQLogo4.png


DTS-CD converted to FLAC:
QQLogo5.png


If you use any of the bold 'keywords' below in your album folder name the mod will do the work.

How does this work:
This mod will display logos by reading certain user defined text from the album folder name. Examples for Pink Floyd albums:

Atom Heart Mother (Quad Q8)
Dark Side of the Moon (SACD)
Wish You Were Here (Quad BDA)

So no need to re-tag any music files, just add a ‘codec/format’ to the folder name. Valid Codecs are in the Rules section below and are user definable. You will need to rescan your Music Library in Kodi for it to see the any albums with changed folder names.


Users can modify the 'rules' I've defined and/or modify/add new logos to the QQ Logos folder (named QQcodec) in the skin folder:

The Variables.xml file contains the rules for selecting the desired logo based on a user defined string (text) in the rule condition. This is just a simple xml text file that can be edited easily. (you must restart Kodi for any changes to be applied).

This is what the current variable definition is for 'QQCodecFromPathvar' is:

<variable name="QQCodecFromPathvar">
<value condition="String.Contains(Player.Folderpath,DVDA UM)">QQcodec/upmix.png</value>
<value condition="String.Contains(Player.Folderpath,SACD UM)">QQcodec/upmix.png</value>
<value condition="String.Contains(Player.Folderpath,SACD)">QQcodec/SACD.png</value>
<value condition="String.Contains(Player.Folderpath,DVDA)">QQcodec/mlp.png</value>
<value condition="String.Contains(Player.Folderpath,DVD-A)">QQcodec/mlp.png</value>
<value condition="String.Contains(Player.Folderpath,DTS 9624)">QQcodec/dts9624.png</value>
<value condition="String.Contains(Player.Folderpath,DTS9624)">QQcodec/dts9624.png</value>
<value condition="String.Contains(Player.Folderpath,ADVD)">QQcodec/DVDV.png</value>
<value condition="String.Contains(Player.Folderpath,DVDV)">QQcodec/DVDV.png</value>
<value condition="String.Contains(Player.Folderpath,DVD-V)">QQcodec/DVDV.png</value>
<value condition="String.Contains(Player.Folderpath,Quad BDA)">QQcodec/BDA.png</value>
<value condition="String.Contains(Player.Folderpath,Quad SQ)">QQcodec/QuadSQ.png</value>
<value condition="String.Contains(Player.Folderpath,Quad Q8)">QQcodec/QuadQ8.png</value>
<value condition="String.Contains(Player.Folderpath,Quad QR)">QQcodec/QuadQR.png</value>
<value condition="String.Contains(Player.Folderpath,Quad Reel)">QQcodec/QuadQR.png</value>
<value condition="String.Contains(Player.Folderpath,Quad QS)">QQcodec/QuadQS.png</value>
<value condition="String.Contains(Player.Folderpath,Quad CD4)">QQcodec/QuadCD4.png</value>
<value condition="String.Contains(Player.Folderpath,Quad Q4)">QQcodec/QuadQ4.png</value>
<value condition="String.Contains(Player.Folderpath,Quadradisc)">QQcodec/quadradisc.png</value>
<value condition="String.Contains(Player.Folderpath,Quad)">QQcodec/quadraphonic.png</value>
<value condition="String.Contains(Player.Folderpath,BDA)">QQcodec/BDA.png</value>
<value condition="String.Contains(Player.Folderpath,BDV)">QQcodec/BDA.png</value>
<value condition="String.Contains(Player.Folderpath,Penteo)">QQcodec/upmix.png</value>
<value condition="String.Contains(Player.Folderpath,Upmix)">QQcodec/upmix.png</value>
<value condition="String.Contains(Player.Folderpath,Multitrack)">QQcodec/multitrack.png</value>
<value condition="String.Contains(Player.Folderpath,Atmos)">QQcodec/dolbyatmos.png</value>
<value condition="String.Contains(Player.Folderpath,DTSX)">QQcodec/dtsx.png</value>
<value condition="String.Contains(Player.Folderpath,DTS-CD)">QQcodec/dtssurround.png</value>
<value condition="String.Contains(Player.Folderpath,DTSCD)">QQcodec/dtssurround.png</value>
<value condition="String.Contains(Player.Folderpath,DTS CD)">QQcodec/dtssurround.png</value>
<value condition="String.Contains(Player.Folderpath,DTSDVD)">QQcodec/dtssurround.png</value>
<value condition="String.Contains(Player.Folderpath,Dolby DVD)">QQcodec/dolbydigital.png</value>
<value condition="String.Contains(Player.Folderpath,DTS DVD)">QQcodec/dtssurround.png</value>
<value condition="String.Contains(Player.Folderpath,DSF)">QQcodec/dsd.png</value>
<value condition="String.Contains(Player.Filename,.flac)">QQcodec/flac.png</value>
<value condition="String.Contains(Player.Filename,.dsf)">QQcodec/dsd.png</value>
<value condition="String.Contains(Player.Filename,.dff)">QQcodec/dsd.png</value>
<value condition="String.Contains(Player.Filename,.mp3)">QQcodec/mp3.png</value>
</variable>

This works as a stacked rule list, when run each rule is sequentially tested, top down, and if its condition is True the value is returned and no further rules are tested. That means the first match is used, hence the order of rules above.

In the first rule:
<value condition="String.Contains(Player.Folderpath,SACD)">QQcodec/SACD.png</value>

The condition (test) means: If the current playing file's folder path contains the word 'SACD' then return the logo file name 'SACD.png' from the logo folder.

So its easy to add a new rule (copy a line and modify) or to change a rule to check for different text value or use a different logo file.

NOTE: In Linux and Android filenames are case sensitive (Example: FileName.png is not the same as filename.png). In Windows they are seen as the same file.


Channel Identification and Display:
Since many of us use silent channels to fix playback of quad files on many AVRs I have also added a new variable used in this mod named 'QQNoOfChannelsFromPathvar'. This variable is used to update the Number Of Channels dispalyed in the Kodi UI based on rules.

The new variable basically returns 'Quad' for any album path with the word 'Quad' in it, likewise 'Atmos' and 'DTS:X', otherwise it looks at the number of channels and returns it converted to MCH naming:

<variable name="QQNoOfChannelsFromPathvar">
<value condition="String.Contains(Player.Filename,Quad) + String.Contains(Player.Folderpath,Penteo)">4.1</value>
<value condition="String.Contains(Player.Folderpath,Quad) + !String.Contains(Player.Folderpath,Quad Penteo)">4.1</value>
<value condition="String.Contains(Player.Folderpath,Quad)">Quad</value>
<value condition="String.Contains(Player.Folderpath,Atmos)">Atmos</value>
<value condition="String.Contains(Player.Folderpath,DTSX)">DTS:X</value>
<value condition="String.IsEqual(MusicPlayer.Channels,5)">5.0</value>
<value condition="String.IsEqual(MusicPlayer.Channels,6)">5.1</value>
<value condition="String.IsEqual(MusicPlayer.Channels,8)">7.1</value>
<value condition="String.IsEqual(MusicPlayer.Channels,2)">stereo</value>
<value condition="String.IsEqual(MusicPlayer.Channels,1)">mono</value>
<value>$INFO[MusicPlayer.Channels]</value>
</variable>
 
Last edited:
How do I get Kodi to Find New Albums added to your Music Source.

To get Kodi to check your Music Source(s) for new albums/files:

Click the Kodi 'Music' menu on its main menu

Be default that displays the 'Artist' view (although users can customise that to display other views)

At the Artist view:

Keep clicking left arrow key until the left fly-out menu appears:
Kodi Customise 1.PNG


Click on the menu item 'Update Library' and Kodi will rescan your previously defined Music Sources looking for new folders/files and any files that may have changed. If changes/new files found these are updated in the Kodi Library database.

The Second method (often faster) is to go the the Kodi 'Media' screen (System, Media as described previously in this thread)

Then go to your Music Library Source, find the new Album folder in the source, right-click on the album (or if using a remote control press and hold down your remote's Select button) and a pop-up menu appears:
Kodi Customise 3.PNG


Click on the menu item: 'Scan item to library' (as shown)

Kodi will only scan the selected folder, read the file tags and the album to its Music Library database.
 
View Customization:

Users can change the default view in any Kodi Music screen (Artists, Albums, Songs) by again clicking left until the left fly-out menu appears and selecting the 'View' option at top left of the fly-out menu (see first screen shot in previous post).

In the next screen shot I selected a view named 'List':
Kodi Customise 4.PNG


The first screen shot in my previous post uses a view named 'Fullscreen Wall'

Here's a view named 'RightList':
Kodi Customise 5.PNG


There's about 20 different views available.

Kodi uses your last selected view. You can have different Views for each of Artists, Albums and Songs.
 
When Kodi scans your music files it looks on the web for information about each artist and album.

Right-click on any Artist(or if using a remote control press and hold down your remote's Select button) and a pop-up menu appears:

Click: 'Information' and Kodi displays metadata about your selected artist it found on the web:
Kodi Customise 6.PNG


Right-click on any Album or if using a remote control press and hold down your remote's Select button) and a pop-up menu appears:

Click: 'Information' and Kodi displays metadata about your selected album it found on the web:
Kodi Setup Media 8.PNG


All this metadata for artist and albums was found by Kodi during the initial Source Library scan. I did nothing. You just need to ensure your music is tagged correctly (exact artist names and album names).

However, Kodi does allow you to edit this metadata (another topic). So Quad and Music aficionados rejoice. You can add your own details about the history of an old quad release, mixing, remixing, band members, recording 'incidence', snippets and gossip etc.

Go for it.

EDIT: It’s been a long standing dream of mine to somehow share album and artist information on quad recordings a Kodi format we can all use. Maybe one day...
 
Last edited:
And you can add your Music Concerts and Video to Kodi too. Kodi plays 4k UHD, 1080p and DVD video with DTS, DTS-HDMA, Atmos, TrueHD audio and has a nice user interface to choose your concerts/songs as you would expect:

KodiMusicAlbums.PNG


Another thread maybe...

Kodi can be controlled via a smart phone or tablet contested to WiFi. I use an iPad.

Here's a few shots from my iPhone using a free Kodi Remote app:
iPhoneArtist.png


iPhoneAlbums.png


iPhoneSongs.png


iPhoneRemote.png
 
Last edited:
Here's screen grabs of Kodi Music after scanning my Penteo UM folder into the library:

The Artist view: (views are configurable)
View attachment 68614

The Artist's Album view (For AC/DC):
View attachment 68616

The Kodi screen when playing a track:
View attachment 68617

If there is a file named 'discart.png' or 'discart.jpg' in the album folder it is displayed abd rotates.

The Artist Slideshow runs and shows a new fanart picture in the background every 7 seconds. Pictures are downloaded automatically.

The ticker-tape line at bottom displays artist biography (auto scrolls).

The Kodi.zip file includes my QQ codec skin mod so codec logos are displayed (Penteo for this album)

Is there a way to make all the artists thumbnails (artist view), in the Wall view, the same brightness as the one that is focused on?
 
Is there a way to make all the artists thumbnails (artist view), in the Wall view, the same brightness as the one that is focused on?

Here's a modified View_609_Fullscreen_Wall.xml skin file to make all artist images bright in the FullScreen view (the skin uses a defused texture to dull unselected pictures).

https://drive.google.com/file/d/1Ei2Q5PxBm7P0NiLN272lN5DWB8oVr1z1/view?usp=sharing
Copy this file into your Kodi addons Aeon.Nox.Silvo skin’s 16x9 folder. In Windows its here:

C:\Users\[YOUR USER NAME]\AppData\Roaming\Kodi\addons\skin.aeon.nox.silvo\16x9
 
Last edited:
Here's a modified View_609_Fullscreen_Wall.xml skin file to make all artist images bright in the FullScreen view (the skin uses a defused texture to dull unselected pictures).

https://drive.google.com/file/d/1Ei2Q5PxBm7P0NiLN272lN5DWB8oVr1z1/view?usp=sharing
Copy this file into your Kodi addons Aeon.Nox.Silvo skin folder. In Windows its here:

C:\Users\[YOUR USER NAME]\AppData\Roaming\Kodi\addons\skin.aeon.nox.silvo

I simply downloaded the file and put it in that folder. I started Kodi from a closed state. It didn't work. Did I need to copy the text and paste it somewhere? Thanks!

EDIT...I found in the 16x9 folder, a file with the same name. I tried replacing it with the one you sent me. It still didn't work. Thanks again.
 
Last edited:
My mistake. It should be in the 16x9 folder. Restart Kodi for it to read the new file.

It didn't change anything when I replaced the file in the 16x9 folder sadly. I doubt I will ever understand why it is like that. Even if darkening the other thumbnails was an option, it shouldn't be the default option. Great skin regardless Thanks again.
 
I’ll check on my system again.

I only changed the artist ‘FullScreen Wall‘ view not the artist ‘Wall‘ view.
 
Back
Top