Right-click on "Playing Now" at the top-left of the tree at the left and the drop-down will give you the options.The setup for this "zones" was described as a piece of cake by our Kal resident audiophile wiz wonder. But no instructions was given.

You are using an out of date browser. It may not display this or other websites correctly.
You should upgrade or use an alternative browser.
You should upgrade or use an alternative browser.
JRiver digital playback for beginners. Question and Answer Forum, 2021.
- Thread starter marpow
- Start date


Help Support QuadraphonicQuad:
This site may earn a commission from merchant affiliate
links, including eBay, Amazon, and others.
I use Jriver to split SACD iso into the individual files. If the SACD is a multichannel create two versions of the album, a stereo and a multichannel (to the latter I add MCH* to the title, but that's just me). So in my library I've two versions of the album - see below

This doesn't bother me as I've two playback areas - the main one doesn't play multichannel, (Stereo only, I've a DSD dac it plays gapless) it sounds awesome. The secondary one where my Sony UHP-H1 is plays both. But as it's connected via DLNA and the Sony doesn't support gapless playback over DLNA then splitting the files works best for me.
*I've named the SACD version as (SACD) because I have the original CD version as well on Jriver because, well I think it sounds good
I'm just finalizing the next release of Music Media Helper (MMH) which adds support for JRiver tagging of MKV and other video file formats. This adds creation/updating of JRiver sidecar XML files containing tags that can be automatically generated from a MusicBrainz online lookup (or generated from a tracklist copy and paste easily). MKV can be used to get JRiver to play Atmos, DTS-HDMA etc via HDMI pass-through to an AVR with Atmos/DTS-HDMA decoders.
Here's a screen shot of what JRiver shows after MMH auto creates sidecar XML files for a concert disc ripped to MKV and split into chapter (song) files:

Without using MMH all the above columns are empty (you can manually enter this data but now MMH will do it for you).
MMH also has a Batch Creation tool that can semi automatically create the JRiver XML tagging files recursively for all album/concert sub-folders under a selected root folder. Easy as.
This version of MMH is now being beta tested by @marpow, @MrSmithers and @himey. It should be released late this week.
Here's a screen shot of what JRiver shows after MMH auto creates sidecar XML files for a concert disc ripped to MKV and split into chapter (song) files:
Without using MMH all the above columns are empty (you can manually enter this data but now MMH will do it for you).
MMH also has a Batch Creation tool that can semi automatically create the JRiver XML tagging files recursively for all album/concert sub-folders under a selected root folder. Easy as.
This version of MMH is now being beta tested by @marpow, @MrSmithers and @himey. It should be released late this week.
STEP 1.
Now that we see some interest and you all can keep chatting of course, I would like to start with job #1 for the beginner.
My suggestion is to create a simple little library. Take 3 CD's and rip them, store them organized and then we can download the newest version of JRiver and start with playback, as you can see already a lot of people are very advanced but we will stay focused to get all included.
Some computers have internal CD/DVD/Blu Ray and some do not. My PC laptop I use, does not.
I use this Pioneer External Ripper and connect USB in to my PC. You might want to think ahead and get a 4K Blu Ray ripper This One .
Lets not get to concerned with deals, prices , etc this is just to get you going.
You can rip and burn directly with JRiver using the ripping machines but I have never done this as my library is large enough that only an external hard drive NAS is suitable.
Then you will need a software program installed on your computer, there are fancy ones, but I just use what my PC came with.
It is called Windows Media player. I only use this for ripping CD's nothing else.
In Tools>open options> choose FLAC (lossless), remember we are just beginners, doing CD's now, will get more advanced later.
Choose a folder on your PC where your rip will go to after ripped. I choose Downloads. I only use it as a temporary folder. From there after inspected, maybe rename the title, whatever I then move to my storage vault.
So for today, very simple baby step. Rip CD, to folder on your PC, then lets see if we are successful at 3 or 4 CD's and next we can start importing to JRiver and setting up for playback. I will continue to write regardless of feedback hopefully engaging and helping even those who are on the side. Screenshot of very simple Windows Media Player.
.png")
Now that we see some interest and you all can keep chatting of course, I would like to start with job #1 for the beginner.
My suggestion is to create a simple little library. Take 3 CD's and rip them, store them organized and then we can download the newest version of JRiver and start with playback, as you can see already a lot of people are very advanced but we will stay focused to get all included.
Some computers have internal CD/DVD/Blu Ray and some do not. My PC laptop I use, does not.
I use this Pioneer External Ripper and connect USB in to my PC. You might want to think ahead and get a 4K Blu Ray ripper This One .
Lets not get to concerned with deals, prices , etc this is just to get you going.
You can rip and burn directly with JRiver using the ripping machines but I have never done this as my library is large enough that only an external hard drive NAS is suitable.
Then you will need a software program installed on your computer, there are fancy ones, but I just use what my PC came with.
It is called Windows Media player. I only use this for ripping CD's nothing else.
In Tools>open options> choose FLAC (lossless), remember we are just beginners, doing CD's now, will get more advanced later.
Choose a folder on your PC where your rip will go to after ripped. I choose Downloads. I only use it as a temporary folder. From there after inspected, maybe rename the title, whatever I then move to my storage vault.
So for today, very simple baby step. Rip CD, to folder on your PC, then lets see if we are successful at 3 or 4 CD's and next we can start importing to JRiver and setting up for playback. I will continue to write regardless of feedback hopefully engaging and helping even those who are on the side. Screenshot of very simple Windows Media Player.
Last edited:
Maybe I can help. For the JRemote app, which is great. Load app from app store. Then go to settings, top left, then Add New Server, then the easiest is "connect with access key".But what I have not gotten set up is JRemote or the feature to play ISOs. I get an error when I try clicking on an ISO, and I figure it’s a setting I’ve not yet set correctly?
Find your access key in JRiver Tools>Options>Media Network>Check the very top box> should take you through prompts to get your access key. Type the access key usually 6 characters and you should be good.
All your zones will show in the app. You will only see one zone in lower left of app, the last one played, but if you tap that zone, all your zones will show and you can choose another if you like.
Here are four screenshots from my phone:


I was messin' around and stumbled on this regarding NAS storage and I thought it might be helpful to those starting out.
Synology "What Is NAS?"
Synology Video Tutorial's
Synology "What Is NAS?"
Synology Video Tutorial's

$94.99
$119.99
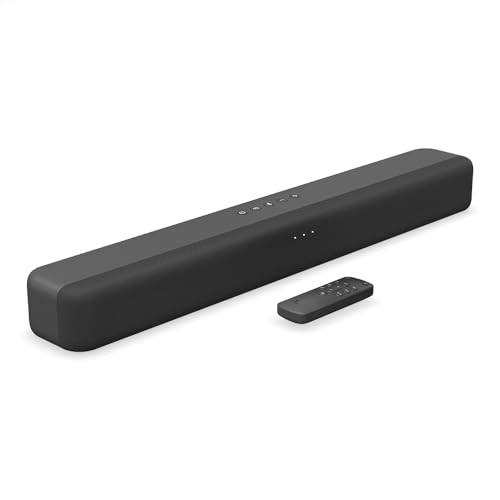
Amazon Fire TV Soundbar, 2.0 speaker with DTS Virtual:X and Dolby Audio, Bluetooth connectivity
Amazon.com

$199.00
$279.00
Bose TV Speaker - Soundbar for TV with Bluetooth and HDMI-ARC Connectivity, Black, Includes Remote Control
Amazon.com


$2,999.00
Marantz SACD 30n Super Audio CD Player with Integrated with HEOS Built-in (Black)
Audio Advisor, Inc.


$405.00
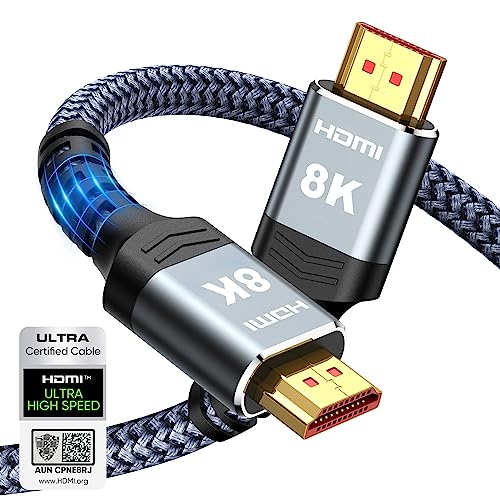
Sony X800 - UHD - 2D/3D - SACD - Wi-Fi - Dual HDMI - 2K/4K - Region Free Blu Ray Disc DVD Player - PAL/NTSC - USB - 100-240V 50/60Hz for World-Wide Use & 6 Feet Multi System 4K HDMI Cable
220-electronics (Region Free Guaranteed!!)

leefarber
Active Member
I would love a tutorial in how to rip Atmos Blu-rays on a Mac and play them through JRiver via DLNA through an Oppo 205. Atmos playback is the one thing forcing me to use physical media. Once I learned how to add 5.1 FLACs to my server, it was a revelation. If only I could play back gaplessly via DLNA. Oh well...
I hear you on that. I know for sure someone here will be able to help you. I have no experience with MAC. I just learned how to do Atmos rips and JRiver play back.I would love a tutorial in how to rip Atmos Blu-rays on a Mac and play them through JRiver via DLNA through an Oppo 205. Atmos playback is the one thing forcing me to use physical media. Once I learned how to add 5.1 FLACs to my server, it was a revelation. If only I could play back gaplessly via DLNA. Oh well...
Maybe I can get you started and you can use your MAC knowledge and get it figured out.
1. Rip Blu Ray using MakeMKV. The list of chapters will have choices, check the TruHD selection only and this will have the Atmos encoded section. If you highlight the TruHD you can see on the right main pane that it is Atmos.
Decide where you want this rip to go to, I have chose Videos in my C drive.
2. After rip open Music Media Helper. I find an easy tab is either the split concert top tab or extract audio from MKV. In the preferences before you split check the box JRiver, keeping checking the preferences as u go along as I forget exactly when the check box for JRiver side car comes up?
3. Go to your place that all was completed, check to see if OK.
4. Import a single file to your JRiver.
Should populate in the video section of JRiver.
5. My playback is in a zone I created called Atmos which is HDMI bitstreaming.
There is a little bit more to this but hopefully My PC way will get you started on MAC?
.png")
Mark,
Do you play movies (Atmos or otherwise) through Jriver, too, or do you not rip those and simply use a disc player?
Do you play movies (Atmos or otherwise) through Jriver, too, or do you not rip those and simply use a disc player?
Ted, no I don't rip movies, but I at least now know how, same process and playback as ripping Atmos music discs.Mark,
Do you play movies (Atmos or otherwise) through Jriver, too, or do you not rip those and simply use a disc player?
@HomerJAU has made my world a better place. I thought about it (ripping movies) but decided against it. Biggest reason I don't own that many movies, then I thought about increased NAS space and finally it came down to me not wanting to be busy to be busy. It is so easy just to pop in what movies I do own in the player. My wife and I are generally not repeat movie watchers, see it once and rarely if ever go back and watch again. Totally different for me than music listening where over the years I go back and back.
ah but the best part of a h265 movie rip is the single concatenated file for The Godfather II, Red Cliff and others; and of course the ability to watch anywhere.
What about video concerts like the last few Big Big Train releases?Ted, no I don't rip movies, but I at least now know how, same process and playback as ripping Atmos music discs.
@HomerJAU has made my world a better place. I thought about it (ripping movies) but decided against it. Biggest reason I don't own that many movies, then I thought about increased NAS space and finally it came down to me not wanting to be busy to be busy. It is so easy just to pop in what movies I do own in the player. My wife and I are generally not repeat movie watchers, see it once and rarely if ever go back and watch again. Totally different for me than music listening where over the years I go back and back.
Step 2.
Hopefully you have been successful in ripping a few CD's or better yet some other format rips. You have either stored them on your computer PC or MAC. Better yet an external storage device, hard drive, NAS,etc.
I encourage you to watch Ted's two videos, post #3. They are good for the basics. Even they are MC19 versions, much has changed now we are at MC27. One thing I liked what Ted showed in his videos was the versatility of what he has done, his organizational skills. My set up like his can be complicated to the beginner, so my screen shots are not going to be my one that I actually use, but a new start so we can figure out together. Going to be bare bones basic so that you the beginner can go at this slow and easy.
We have got are free trial download. There are options for Windows or MAC downloads. When comes time you will be able to purchase a variety of options, Master, Linux, Personal, etc. I think the basic personal version with 10 access availability's is good enough, as Ted explains in his video #1. Each upgrade maybe one a year will cost you again. I personally don't mind as I feel it is a company that puts out a great program and I like to support them. This is a deal breaker for some, I understand.
When you open you will see this, always no matter how many times you open.
.png")
The next step is to configure how you import from wherever to JRiver. Top left, click Tools>Import. A page pops up. Select middle, "Configure Auto Import" This function sets the standard for how you import in future, which as it says, auto imports. I have done many ways, I have done nothing and auto import works well, but a little slow. I have done "Run Auto Import Now" probably a good idea if you are populating a new hard drive, lots of new rips, etc. I have evolved to only using "Import A Single Folder" I have a very large library and I like things neat and tidy. I rip, I move to NAS, I import a single rip, look at it in JRiver, make sure it's all tagged correctly, dates, etc. I'll get into all that later.
.png")
In this next shot you will see my two drives, the top is my drive on this PC that I am using for educational purpose, the M drive is my NAS, where all my music is stored, which is located downstairs. You can see the boxes I checked, for now that is all you need.
.png")
Todays last screenshot is a populated JRiver. Just press "Recent Albums" in the Blue Audio section. I hope you now have your screen populated as I have. I hate to cut off now as I know you are ready to play, but remember baby steps.
.png") [/QUOTE]
[/QUOTE]
Hopefully you have been successful in ripping a few CD's or better yet some other format rips. You have either stored them on your computer PC or MAC. Better yet an external storage device, hard drive, NAS,etc.
I encourage you to watch Ted's two videos, post #3. They are good for the basics. Even they are MC19 versions, much has changed now we are at MC27. One thing I liked what Ted showed in his videos was the versatility of what he has done, his organizational skills. My set up like his can be complicated to the beginner, so my screen shots are not going to be my one that I actually use, but a new start so we can figure out together. Going to be bare bones basic so that you the beginner can go at this slow and easy.
We have got are free trial download. There are options for Windows or MAC downloads. When comes time you will be able to purchase a variety of options, Master, Linux, Personal, etc. I think the basic personal version with 10 access availability's is good enough, as Ted explains in his video #1. Each upgrade maybe one a year will cost you again. I personally don't mind as I feel it is a company that puts out a great program and I like to support them. This is a deal breaker for some, I understand.
When you open you will see this, always no matter how many times you open.
The next step is to configure how you import from wherever to JRiver. Top left, click Tools>Import. A page pops up. Select middle, "Configure Auto Import" This function sets the standard for how you import in future, which as it says, auto imports. I have done many ways, I have done nothing and auto import works well, but a little slow. I have done "Run Auto Import Now" probably a good idea if you are populating a new hard drive, lots of new rips, etc. I have evolved to only using "Import A Single Folder" I have a very large library and I like things neat and tidy. I rip, I move to NAS, I import a single rip, look at it in JRiver, make sure it's all tagged correctly, dates, etc. I'll get into all that later.
In this next shot you will see my two drives, the top is my drive on this PC that I am using for educational purpose, the M drive is my NAS, where all my music is stored, which is located downstairs. You can see the boxes I checked, for now that is all you need.
Todays last screenshot is a populated JRiver. Just press "Recent Albums" in the Blue Audio section. I hope you now have your screen populated as I have. I hate to cut off now as I know you are ready to play, but remember baby steps.
Side Note: Before we set up zones for playback I thought I would add a couple notes.
JRiver is like much of the media software you own and can do the same thing multiple ways. If I knew every way to work my phone, PC, and JRiver I would be super smart and I am not. When we go through this education you most certainly will be able to custom make JRiver to your own personal needs and lifestyle. I will get you started.
Tagging your music is much improved from when I started using JRiver. Programs like Mp3tag are not needed anymore.
The programs I use for ripping the various formats are all real good.
I went on YouTube and looked at all the JRiver tutorials, a mixed bag of information ranging from not helpful to pretty good, to outdated.
While I was on YouTube I was reminded of the King of all things digital playback, Hans Beekhuyzen, he is a little dry, but highly informative and very knowledgeable. He does talk about Roon, Kodi, and JRiver, but it is his digital gear and digital playback that really makes him stand out, some over my head.
Hans Beekhuyzen YouTube Channel
My goal today is to work with you to set up playback zones so by end of weekend you should be playing back your digital library. At least with CD's. I think that most of us, the greater part of our library is CD's? I could be wrong.
I am curious. What does he have or do that makes him stand out? (I generally do not tolerate YouTube presentations.)but it is his digital gear and digital playback that really makes him stand out, some over my head.
You are a pretty knowledgeable guy, best if you look for yourself. What I say may or may not help you. One thing you may like is he is very consistent, his voice is steady and he does not present as excited or hyped. His graphics are well done.I am curious. What does he have or do that makes him stand out? (I generally do not tolerate YouTube presentations.)
Step 3. Understanding playback zones.
This is where your JRiver plays back on the device that you choose. My everyday playback is on my full functioning home theater rig. I listen to 2.0, 2.1, 3.0, 4.0, 5.0, 5.1 & Atmos. The .0's are no LFE.
I have three zones that I named (you can name them any way you want) Stereo, Multi Channel, Atmos Zone. You do not need 3 zones but I will explain why I have 3 zones.
Stereo Zone. I get into moods where I only like listening to stereo, it sounds great and it does not engage me as much as the other two zones. I also can turn off 2 of the 3 amps, just leaving the 2 channel amp on. It is purely a state of mind only.
Multi Channel zone is my most used as I can play all my music except Atmos through this zone as it reads the same way as the stereo zone. If I am just bouncing around and I don't care about mood, or amps or anything, and I am going from stereo to any MCH source (not Atmos) this zone will play all.
Both these two zones play through a MCH DAC that handles all files, FLAC, DSD all rates except DSD512, WAV, etc. This is connected USB out from the PC to the DAC and then 6 RCA outs to the 7.1 in section of the PrePro. Both these two zones are Bitstreaming set to DSD.
Atmos Zone is not used that much as I do not own that much Atmos music. Unlike the two other zones this must be set to Bitstreaming HDMI and goes directly to back of Pre/Pro. I can play all my music through this zone but if I do I have to bypass the external DSD capable DAC and I do not want to do that. I believe my external DAC performs better than the internal DAC for all digital file music.
I will show you setting up two zones, again you can name them any name you want, a MCH zone in Bitstreaming DSD where you can go either to an external DAC like I do or the back of your AVR, or as some have questioned back of an OPPO for instance, this all must be USB out, that said depending on your AVR or PrePro you need to find out what offers you the best ability for playback and/or sound quality. Chances are you will need a USB A to USB B cable like this Audioquest Brand
You can also just go one zone only for pure ease of function, not concerned with the absolute best sound and that is to go HDMI out from your PC to your AVR or Pre/Pro or OPPO, etc. Setting up a HDMI bitstreaming directly to your player, assuming your player will handle all that you throw at it will allow you to set up one zone for all. There will be some little pop ups that come up regarding play back but JRiver now has the ability to detect the information and adjust, so just let it buffer and it will start playing.
I hope this outline will help you in getting ready for zone set up and play back. This will allow you to look at your equipment and purchase any cables you might need, put some notes down on paper, basically get ready. I don't want anyone to feel discouraged by getting half way through it and find there is no playback. As beginners we can anticipate pulling in and out a few cables to get JRiver and devices to become as one.
Here is a picture of my set up. The larger black box is my fanless PC (holds my JRiver) that is connected USB out to the silver MCH DAC 6 RCA outs to back of Pre/Pro and also connected HDMI out to the AUX HDMI zone in back of my Pre/Pro. With this set up I can use the JRiver remote app or what I do daily is remote in from the laptop I am using now via a remote access program called Splashtop, works great. The others are all HDMI connected, DirecTV and Amazon Fire Cube. Sorry I got a little sidetracked here but I wanted you to get a general understanding of what you are about to do. We will also have to learn all the ripping techniques of all the different formats but we are making good progress. Next will be Step 4, creating a zone.
Mark,
So your bluray player does not go to the AVR/prepro? Instead, what, it goes to the tv and then eARC gets the audio back to the preopro for possible movie Atmos playback?
So your bluray player does not go to the AVR/prepro? Instead, what, it goes to the tv and then eARC gets the audio back to the preopro for possible movie Atmos playback?
Atmos Zone is not used that much as I do not own that much Atmos music. Unlike the two other zones this must be set to Bitstreaming HDMI
I recently bought JRiver to test sidecar xml files and found you can also set Bitstream HDMI Passthrough by file type. So you could set ‘MKV’ to Bitstream regardless of the Zone.
Yes, it does. From Blu Ray>HDMI out to PrePro.Mark,
So your bluray player does not go to the AVR/prepro? Instead, what, it goes to the tv and then eARC gets the audio back to the preopro for possible movie Atmos playback?
The eARC HDMI cable is between PrePro and TV.
Similar threads
- Replies
- 52
- Views
- 6K
- Replies
- 108
- Views
- 5K
- Replies
- 22
- Views
- 2K
- Replies
- 14
- Views
- 2K